Interior painting is one general home improvement project with the ability to transform the look and feel of the living space without major renovation. For the DIYer, painting a room offers a cost-effective way to update and refresh the space. Even if you have no experience painting walls, you can get the job done like a pro by following a few simple steps and tips.
Room Prep Can’t Be Skipped
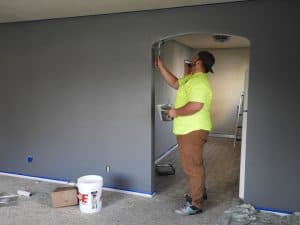
Take the time to prepare the room for painting. This reduces the risk of ruining flooring, furniture, and curtains. It also increases space for better movement and makes it easier to access hard-to-reach areas.
 It may seem time-consuming to prepare a room for painting, but it’s worth it. Here are some top tips:
- Remove as much furniture as possible or push to the center of the room
- Cover all remaining furniture with plastic or canvas sheets/drop cloths
- Roll up and remove area rugs
- Cover flooring with plastic or canvas sheets/drop cloths
- If using plastic sheeting, secure it with painter’s tape so it doesn’t slip
- Remove all outlet and light switch covers
- Use quality painter’s tape around the trim work of doors, windows, baseboards, crown molding and/or the ceiling
Extra tip: A plastic sandwich bag slips over a doorknob, offering easy protection from drips.
Pre-Painting: From Nail Holes to Primer
The second part of room prep is preparing the walls to ensure when the paint dries, everything looks smooth and professional. A lightweight spackle or painter’s putty is great for filling any holes in the walls. Take the time to apply the spackle smoothly and sand, as needed. Any chipped or cracking paint needs to be scraped — the surface should be sanded, as well.
Wipe the walls after sanding and before priming. A clean, lint-free rag is perfect. However, if there are any greasy or dirty spots, it may need to be washed with soap and then rinsed with water. The walls need to be dry and dust-free before priming and/or painting.
Primer helps prepare the surface to receive paint. Take the time and don’t skip this step, it’s worth it. It’s especially important to prime areas that have been sanded.
Choose the Right Tools
There are many choices in the paint aisle — beyond paint brand, type, and color. The painting tools chosen to apply the paint are just as important as the paint itself. Avoid the cheapest paint brushes as the individual bristles often fall out, usually depositing themselves on the wall while painting. This means you have to pick the bristles from the newly painted (wet) wall and then paint over the mess. This issue also happens with poorly/cheaply made rollers. The roller material crushes and/or breaks, leaving nubs in the wet paint. Pros also use a pole extension to eliminate the need for a step stool that has to be constantly moved, saving time and energy.
Extra tip: Choose a thicker nap roller for a textured wall. The more texture, the thicker the roller nap.
Paint Tray vs. Paint Grid
The paint tray has been a standard tool for years as a method when rolling. However, it’s worth considering a switch from tray to the paint grid. With the tray, even the neatest painter can slop when transferring paint to the roller. The paint grid makes it easy to roll with less mess. Plus, you can store the paint in the bucket secured with its lid.
To use a paint grid, you need a 5-gallon bucket. The grid, which is made from a durable plastic or metal, easily hooks onto the bucket rim after filling it about halfway with paint. To begin painting, slide the roller into the bucket and roll it along the grid to remove the excess paint like you would with the traditional tray.
Pro Painting Techniques
 Do the edging around the ceiling, baseboards, windows, and doors first. A brush with angled bristles makes this job easier. When ready to roll the rest of the surfaces, paint from top to bottom. Don’t give in to the temptation to go over a section several times. Doing this will remove paint and leave streaks. Another way to avoid overlap streaking is to keep the edge of the roller wet while making full-length rolls from top to bottom.
Extra tip: An airless paint sprayer may be an efficient choice for larger jobs.
It’s tempting to want to hire professional painters, but it can push the budget limits. The average cost to hire painting pros is approximately $1,700, while a DIY home painter can complete the job at a fraction of the cost. Following a few tips can get the job done like a pro but without the heavy expense.
Resources:
¹https://www.homeadvisor.com/cost/painting/paint-a-home-interior/
https://www.diynetwork.com/how-to/skills-and-know-how/painting/15-painting-tips-to-paint-like-a-pro
https://www.thisoldhouse.com/ideas/secrets-pro-painters
Author bio: Steve A. Parker is Director of Communications at Raider Painting, a California-based commercial and industrial painting company. It is committed to providing solutions that enhance and prolong the life of your workspaces and equipment.