One of the main questions that people often e-mail me about is various ways to paint wooden furniture. While there are a few different ways to paint, we will cover how to paint wooden furniture with a paint sprayer the traditional way and then we will add a few tricks on how to paint wooden furniture a few other ways. First let’s take a look into the question on step #1.
Step 1: To Sand or Not to Sand
While many people feel that it is essential to sand any type of wooden furniture before using a paint sprayer, this is not always the case. If you choose to sand we will cover this in the steps below, because this is the most traditional method, but for those who choose not to sand their furniture this is also an option that is becoming more and more popular. Either way this is the first step you must take before venturing any further into spraying your wooden furniture.
Route A- How to Paint Wood Furniture without Sanding
More and more people are choosing to skip sanding their wooden furniture in favor of using a liquid sander deglosser. Liquid sander deglossers have been around for some time, but have shown an increase in popularity over the last few years as more and more people have turned to this liquid to help them paint. Liquid sander deglossers are reasonably cheap and can be found at most big box hardware stores such as Lowe’s, Home Depot and even Wal-Mart.
The purpose of the liquid sander deglossers is to give wood a rough finish similar to sanding, without all the effort of sanding. Following the directions on your specific liquid sander deglosser is always a wise move, but traditionally most people will use a small paint brush to apply this liquid to their wood and then wipe it off 20 minutes or so later. Below is a picture of what wood looks like with the liquid sander deglosser on it.
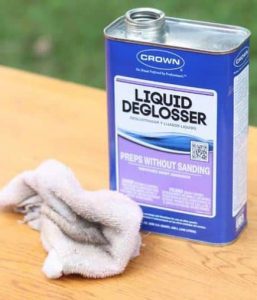
Use a Liquid Deglosser if you want to avoid sanding
Route B- Traditional Sanding
If you choose to go the traditional route when painting your wooden furniture you are one that will take time and sand the furniture. Whether you are using a power sander such as you would use when painting a car or are sanding the old fashion way (by hand) we recommend taking time to sand with at least two different grits of sandpaper before moving forward.
As a rule of thumb for sanding I will use 80 grit sandpaper on my first sanding and double it to 160 grit sandpaper before I move forward. If you have time I recommend sanding by hand during your final sanding as you are able to smooth things out working the sandpaper in and out of your furniture.
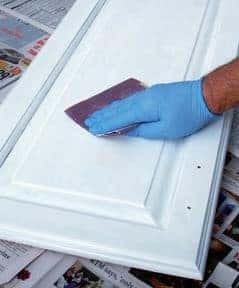
Hand sanding is recommended for best results
Step 2: Remove all the debris from your wooden furniture
This is definitely the easiest part of your tutorial on how to paint wooden furniture with a paint sprayer, but sometimes gets overlooked. While no one really enjoys sanding, it will often leave a residue of dust and mess that is sometimes overlooked. With that being said, follow the three step process below for a fool proof method in getting rid of all sanding residue from your furniture
- Use a damp cloth to wipe off your furniture
- Use a dry cloth to wipe off any water marks
- Use a vacuum on your wooden furniture to get any leftover bits and pieces
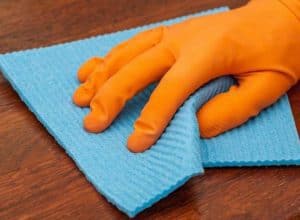
Damp cloths are good for getting off debris
Step 3: Use a primer to paint your wooden furniture
If you enjoy using paint sprayers on your wooden furniture it is wise to use a separate sprayer when priming. If you only have one paint sprayer, you will have to clean it thoroughly before the next step.
In my opinion it depends on how large of a project that the furniture is and how much time I have before choosing what tool to use for my primer. If it is a small wooden stool or table, I will generally use a paint roller, if it is a dresser, cabinets or something large I will use one of my smaller airless paint sprayers.
Priming is usually done in several thin coats rather than a large coat. Primer dries much quicker than paint so you can apply several coats within a short time period (15 minutes or so per application). How much primer you need depends on what you will be priming.
Optional Sanding: If you feel that your wood still has some nicks or divots after priming, you can wait until your last coat of primer dries and LIGHTLY sand needed areas again.
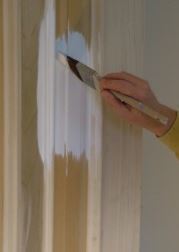
Primer with a small paint brush is usually my first choice
Step 4: Prepping to Use a Paint Sprayer on Wooden Furniture
Using a paint sprayer to paint wooden furniture is actually a several step process, but much like any painting project it is important to prep the area and yourself before moving forward.
- Prepping the area: If you are painting inside it is necessary to have plenty of plastic, tarp and/or painter’s tape available to block off any area that you don’t want to paint. If possible I recommend painting in your garage or outside as you can get by with just using a tarp or some old cardboard boxes.
- Read your instruction manual: If you have used this paint sprayer then you can skip this step, if not we advise you to read through your paint sprayer instruction manual so that you know the ins and outs of your paint sprayer.
- Practice your painting: As with any type of painting job I always advise people to practice before they paint. If you have spare boxes this is usually the best test as you can observe the coat thickness and the spray of your paint sprayer. If your paint sprayer needs cleaned, follow the instruction manual and clean your paint gun before using it.
Step 5: Painting Wooden Furniture with Your Paint Sprayer
As of now you have sanded (or used a liquid sander deglosser), primed, practiced and prepped. Let’s move forward on the actual process of painting wooden furniture with a spray gun. Painting is the easiest part of the journey. Here are some tips on painting your wooden furniture.
- Adhere to proper distance with your paint sprayer
- Paint in several thin coats rather than one thick coat (we recommend 3+)
- Have a small brush available for any small areas that you cannot reach
- When using a paint sprayer to paint wooden furniture use steady strokes
- Spray evenly over the surface

Make sure your area is prepped before painting
Step 6 (BONUS) – How to Paint Wooden Furniture Distressed Look
Due to popular demand I have added a bonus step for those of you looking to paint wooden furniture a distressed look with a paint sprayer. More and more people want a distressed look when it comes to rehabbing old wooden furniture. Here is a bonus step on giving your wooden furniture a distressed look.

Cool wooden dresser with distressed look
The key to the distressed look is using a sander after you have completed painting. To make your furniture have this look I recommend using the sander at certain parts of your furniture to sand through after your last coat of paint has dried.
Allowing the old wood to show through is the key to the distressed look and you can make it look to your desire. Focus on the edges of the furniture first and then work your way in to give the most common wooden furniture distressed look seen in today’s furniture.
Depending on whether you are painting a wooden fence or a wooden bunk bed, the same basic principles apply. It is important to develop a game plan and be patient as a good piece of wooden furniture does take some effort to paint. Follow the steps above to paint wooden with a painter sprayer and you can make your wooden furniture look brand new or distressed in no time.