Like any type of home DIY project, many people don’t think about the pitfalls before they start. Many people think it is as easy as grabbing your paint sprayer and going to town. As a 20+ year professional in the painting industry, I can tell you firsthand that there is more to it than this. Let’s take a look at how to paint a wooden fence.
Having all the materials, prepping and actually painting your wooden fence with a paint sprayer are something that can be done right the first time if you follow the guide below. Let’s take a look at the 9 simple steps to fence painting below.
How to Paint a Wooden Fence with a Paint Sprayer- Step by Step
Anytime you are painting outside it is important to prepare properly as there are numerous conditions that you will have to deal with. Let’s take a look at all the steps that you need to follow to paint your fence as quickly and effectively as possible.
Step 1- Know the weather conditions
The weather plays a huge factor whenever you are planning to paint outdoors. Besides dealing with the potential of rain, there are several factors that you must look at before starting to paint. Any of the following extreme conditions can play a role in whether or not you should paint your fence during that day.
- Rain– Any chance of precipitation can ruin your painting. Raining after
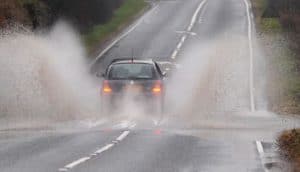
Rainy conditions are NOT ideal for painting
paint will wipe out your hard work. If you see any chance of rain in the forecast, it is wise to avoid painting that day.
- Temperature– Summer is easily the time most people complete painting projects. Any heat over 85 degrees can cause issues with a paint. While most places do get over this temperature in the summer, we advise to try and paint in the early morning or early evening to try and find temperatures below this mark.
- Humidity– Humidity can play a huge role in how well the paint dries and the amount of times you may have to repaint a fence. Avoid days when humidity is over 50% in your area.
- Wind– Windy days are also bad for painting as the paint is sprayed from your paint sprayer the wind could cause it to splatter or miss its intended target. Try to find cool, calm days before starting your project.
- Disaster Chances– While this is purely obvious, we like to cover all of our bases. Any large disasters such as floods, hurricanes, severe thunderstorms should also be avoided when painting outside.
Step 2- Prep Your Area
If you are painting in a yard, always mow the grass, pull any weeds and trim trees around your fence. If you are painting in an area with concrete, cover up the concrete with painter’s tape and plastic. We will go into this more in step 3 below. Also it is a good gesture to let your neighbors know what you are doing so they can remove any objects from this area and pets that may come roaming over once they hear the paint sprayer starting up. Here is a comprehensive list of what you may need, but you will not need all of these for this particular project.
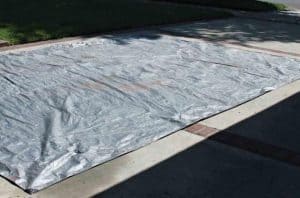
Painting tarp can make clean-up easy
Step 3- Remove or Cover all Items in the Area
While not a necessity, we advise anyone that is painting outdoors to invest money in tarps, plastic, cardboard boxes and plenty of painter’s tape. Anything that can’t be moved, such as satellite dishes, playground equipment, and sheds should be fully covered and taped with one of the items listed above. Also, when painting a fence using a paint sprayer, it is wise to cover the ground and above the fence with cardboard to avoid ruining your grass or overspray going into your neighbor’s yard.
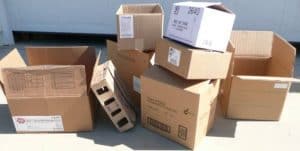
Old cardboard can be used to avoid overspray
Step 4- Practice before You Paint
Just like a Major League Baseball player taking warm-ups it is wise to practice a little before you start painting. If you have already used your paint sprayer before, that is great this will be easy. If not, it is wise to read the instruction manual and practice using your sprayer before spray painting your fence. A good way to practice outdoors is to use old cardboard boxes to practice your spraying technique.
Step 5- Practice Proper Technique
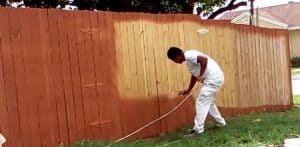
When using a paint sprayer the two most important things are distance from object & paint stroke.
- Distance– We recommend staying 2” away from anything that you are painting, anything farther away from that will result in more overspray and less accuracy with the paint gun.
- Paint Stroke– A smooth, consistent paint spray stroke is the best. Always hold your paint gun steady and spray in a smooth manner to avoid excessive paint in one area.
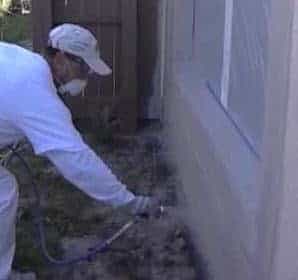
Proper spraying technique – 2-4″ from target
Step 6- How to Paint a Fence Fast- Use the Rectangle Method
If you want to paint a fence fast we advise to break the fence down into several rectangular shapes as shown in the picture below. As a rule of thumb I always paint the top first and then go down to form a rectangle. This is done with one smooth stroke as I walk around the fence. Usually I try to divide the fence into separate sections this way making it easier on myself.
If I have multiple sprayers with me at the time I will generally use a smaller sprayer such as a Wagner Spraymax to save time on the outlining.
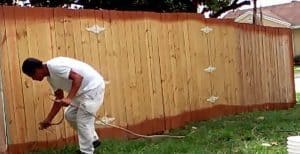
Spray in rectangle for quicker results
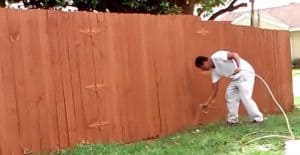
Step 7- Painting Up and Down to Fill in the Rectangle
Depending on the fence, I usually fill in the rest of the rectangle by working from bottom to top spraying quickly. Always make sure when you are painting a wooden fence to keep steady and move at a decent pace. With a good paint sprayer such as a Graco Airless Paint Sprayer you should be able to cover plenty of ground in a short amount of time.
Fill in the rectangle by painting from top to bottom
Step 8- Applying the Second Coat
Just like any other paint job, the first time you paint will often have a few spots where the paint did not go on like you wanted. Immediately after completing your square, do one final run through with your paint sprayer and paint the fence from bottom to top using smooth, consistent strokes.
Spray up & down when applying the 2nd coat
Step 9- Completing the Entire Fence
If you choose a good paint sprayer, these first two coats should be all that you need to complete your project. If you are using a roller or a cheap paint sprayer then you may have to add another coat the following day. If you want to paint your fence fast, we advise that you follow this rectangle method around your whole fence.
Review- How to Paint a Wooden Fence with a Paint Sprayer
Painting your wooden fence with a paint sprayer can be a fun and easy job if you prepare the right way. As with any painting project it is always wise to do a quick run through with your paint gun to make sure everything is working properly. Hopefully this guide will help you as prepare to paint your fence. Any questions, comments, or suggestions please give shoot me an e-mail at our contact page.