If you would like to learn how to paint your bedroom in 2 hour or less it can be done with right setup and supplies. Painting for most of us can be a drag, but learning how to use a paint sprayer can make things much easier. If you have ever painted a room the traditional way (rollers, can of paint) you know how much of a pain this can be.
Painting a bedroom with a paint sprayer is not only fun, but can be done quickly by anyone with a little DIY skills. Let’s take a breakdown on what you will need and then the steps that you can take to painting a room in 2 hours or less.
Painting Your Bedroom- Supplies Needed
Paint Sprayer: There are several paint sprayers that you can use to get the job done. Instead of going through the giving the pros and cons, check out our home page on finding the right paint sprayer for your particular needs. If you choose to use a cordless paint sprayer, you may be able to work quicker, but without the same power.
Quick Drying Primer: Priming the walls of your bedroom makes painting a breeze. It also cuts down on the amount of coa
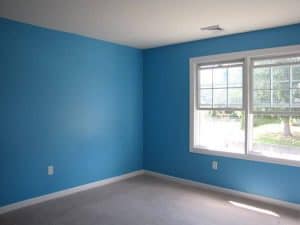
A freshly painted bedroom can make your room look brand new
ts that you need. To properly paint a bedroom in less than 2 hours, it is a necessity to purchase a quick drying primer like the one pictured.
Paint: While this seems obvious it is important to get a quality paint for your walls. Instead of explaining all of the different options that you can I advise checking a website such as this one or talking to a professional at your local Lowe’s or Home Depot and see what they suggest.
Painter’s tape: Painter’s tape can be a best friend for anyone thinking of painting their home on their own. Painter’s tape allows you to cover up anything that you want to avoid painting in your room. These include windows, light fixtures, electrical outlets or anything else.
Tarp or Plastic: To cover your floors, windows and light fixtures you will want to apply painter’s tape and some type of covering to avoid spraying any part of your room that you don’t want painted.
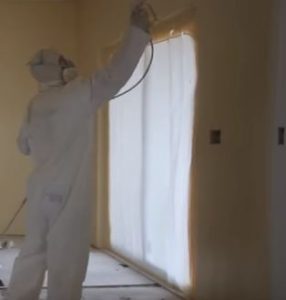
Painter’s mask- As a professional painter I have several safety items that I use when painting, but you can get by with just using a painter’s mask. Paint fumes can cause harm to your lungs and we advise anyone who is painting to invest in a painter’s mask before starting.
Optional items: While not necessary, there are several other items that can be used to help when you are painting your bedroom these including safety glasses, gloves, respirator, painter’s slips for your shoes and a host of other items. While these are not necessary, these can be used and are advised if you are painting multiple rooms.
How to Paint Your Bedroom in 2 Hours or Less- Step by Step
Prepping Your Room (Typically 45 minutes or less)
Prepping your room to paint is by far the most time consuming aspect of painting your bedroom with a paint sprayer. Depending on how much furniture you have and how large your room is this could take anywhere from 30 minutes to 45 minutes. Here are the steps to take to prep for painting
Step 1: Clean out your room- Depending on how much stuff you have in your room this may take a while, so this may or may not be the longest part of your process. It is advisable to get help from a few friends or family members to make this process as quick as possible. If you plan on painting your ceiling, you will want to wash it from cobwebs and any other debris.

Empty all items from your room makes paint spraying easy
Step 2: Tape Your Windows, Walls, & Outlets- Anything that you don’t want painted you will want to apply painter’s tape to. As a rule of thumb I will apply painter’s tape around the edges of windows first and then apply plastic on top of that painter’s tape. As an added step of protection when painting my bedroom in 1 hour I will add painter’s tape over the edges of the plastic again to make sure that no paint gets in.
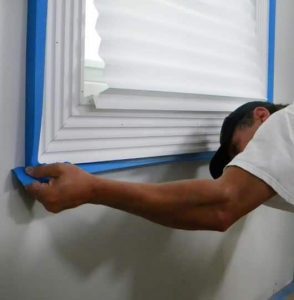
Make sure to tape around all windows before spraying
Step 3: Tape the floor- Much like I tape and apply plastic to the windows and walls when painting a bedroom, I will also tape the floors similarly. I first apply one layer of painter’s tape on all the edges around the bedrooms. Next, I will apply the plastic and/or tarp on the floor. Make sure to cover every inch of floor, even if you are not painting the ceiling. Next apply more painter’s tape on top of the plastic to secure it to the floor.
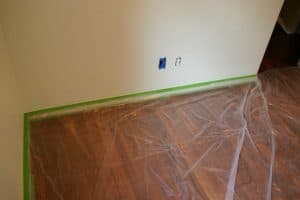
Make sure to cover your whole floor
Step 4: Tape the ceiling- Depending on whether you are painting the ceiling or not, you can now apply paint to your ceiling. If you plan on painting your ceiling you can skip to step 5, if not you can apply tape and plastic to your ceiling the same way you would to your floor.
How to Pain Your Bedroom with a Paint Sprayer (80 minutes)
The following our guidelines we use only when utilizing quick drying primers. It is always advisable to read the back of your primer can to see what time they give for each primer. For the following example we will use an example of using primer on a room temperature of between 70-80 degrees, which typically dries in about 1 hour.
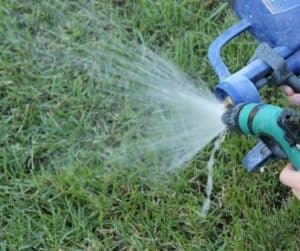
Step 5: Priming Your Walls- Priming and painting are done exactly the same and we have found that a square painting style works best. Divide your room into separate walls or sections and using your paint gun to draw a rectangle around the section. Next you will use the paint sprayer to fill in the middle parts of the wall with primer by using a smooth stroke from left to right and then finally up and down for one more coat. Follow the guidelines that come with your paint sprayer for optimal results.
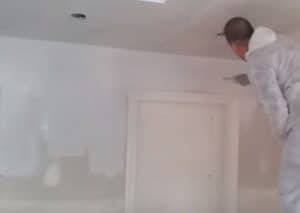
Filling in the middle with primer
Step 6: Set your timer for 50 minutes- Once you get good with using a paint sprayer to paint indoors you will be able to paint a typical 10’ by 10’ room in less than 10 minutes. Using a quick drying primer you can set your watch and start your final painting in about 1 hour from when you painted your first square. This will give you time to clean your paint sprayer, take a small break and reload your paint sprayer with paint.
Step 7: Clean & Reload Your Paint Sprayer- Following the same instructions as you did with your primer, you can now clean and prepare your paint sprayer with the paint that you will use. It is recommended to clean and dry your paint sprayer thoroughly before moving to the final step. Once again, check your instructions manual if you have any questions on proper cleaning procedures.
Cleaning your paint sprayer can be done in no time.
Step 8: Repeat step #5 with Paint- Painting and priming go hand in hand. Just like you did in Step #5 you will now paint your walls using the same “square method”. Just like priming, painting your bedroom with a paint sprayer can be done in no time at all.
Finish with the color of your choice
Conclusion
If you want to know how to paint your bedroom in 2 hours or less, follow the steps above for a quick fix to your room. Like any type of interior painting, it is important to air out the room after painting and close the door to avoid any paint fumes entering other parts of the house. After you have completed your painting project you can go in and do any touch up work (if necessary) for places that you may want improved. If you are using a quality paint sprayer it is highly unlikely that you will have any missed parts.